Add a Menu Item
Add dishes, drinks, or specials to your menu in under a minute.
In short: To add a menu item, open Restaurant Admin → Menu tab, click "+ Add item", fill in the name (required), category, price, description, and photo, then click Save — the item appears on your public menu instantly, grouped under its category.
-
Open Restaurant Admin → Menu tab
From your org dashboard, go to Apps → Restaurant → Open, then click the Menu tab.
-
Click "+ Add item"
The item creation form slides open at the top of the menu list.
-
Fill in the details
Field Notes Name required The dish name, e.g. "Grilled Salmon" Category Choose an existing category or type to create a new one inline Price Numeric value, e.g. 12.99. The currency symbol (set in Restaurant Details) is prepended automaticallyDescription A short, appetizing description of the dish — aim for under 100 characters Image Upload a photo (JPEG or PNG). Square or landscape crops display best Available Checked by default. Uncheck to hide the item from the public menu without deleting it -
Click "Save"
The item is saved and immediately appears on your public menu, grouped under its category.
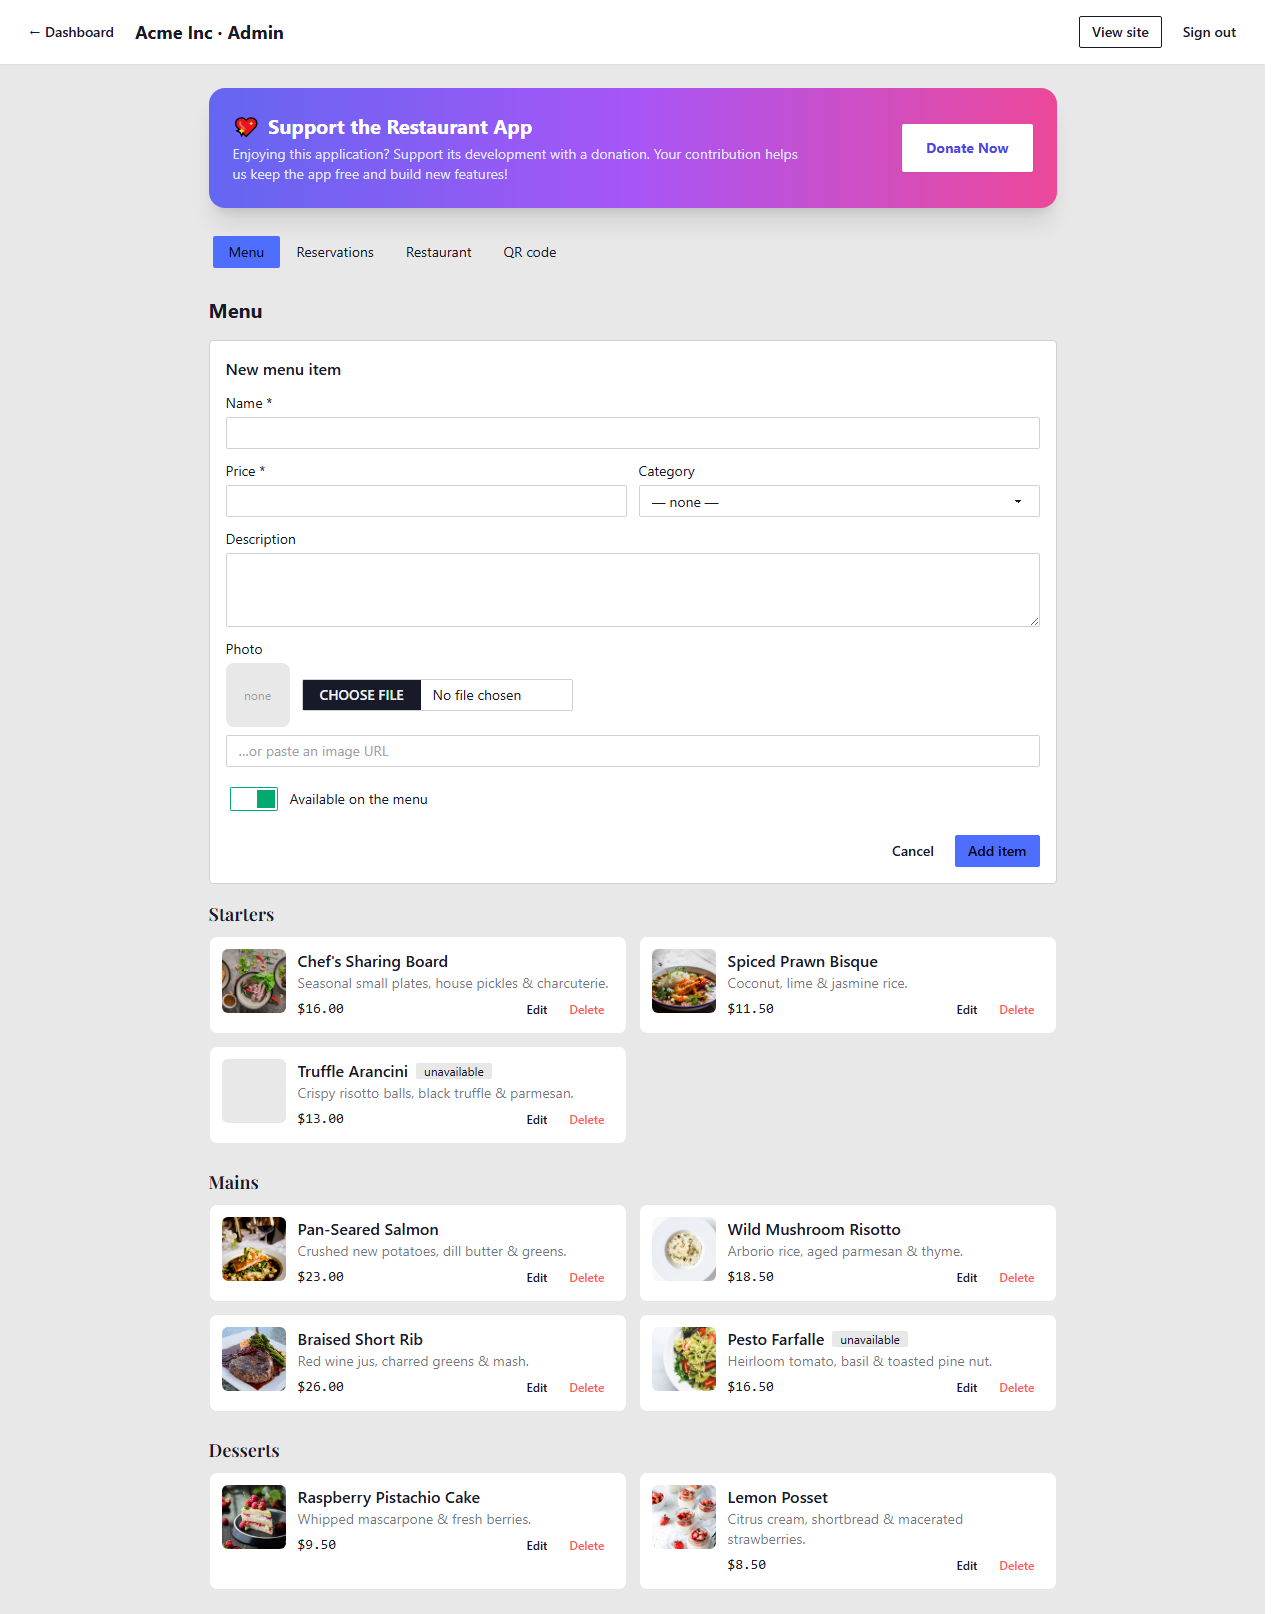
The add menu item form in Restaurant Admin
Tips
- Use high-quality photos — square or landscape images display best. A clear, well-lit photo of the dish significantly increases customer interest.
- Keep descriptions concise — under 100 characters ensures clean presentation on mobile screens.
- Mark as unavailable instead of deleting — if a dish is seasonal or temporarily unavailable, uncheck "Available" rather than deleting it. You can re-enable it anytime.
- Include the price — menus without prices frustrate customers. Even a rough price builds trust.